We kept doing the same thing by hand on every VR and mobile project: open a heavy prop, run it through a mesh simplifier, eyeball the result, repeat for the next fifty meshes in the folder. So we wrote an Editor tool that does the eyeballing for us and applies the result without breaking anything downstream. It’s called Mesh Optimizer, and it’s now the first thing we open before a build goes onto a headset or a phone.
Why the stock workflow wasn’t enough
UnityMeshSimplifier does the actual decimation math well, and we didn’t want to replace it. What it doesn’t give you is a workflow across a whole prefab folder: which mesh belongs to which prefab, whether two prefabs share the same mesh, what the LOD group underneath it expects, and whether the settings that worked on the last prop are the wrong ones for this one. We were doing all of that bookkeeping in our heads, which is exactly the kind of task that should live in a tool instead of a person’s short-term memory.
What it actually does
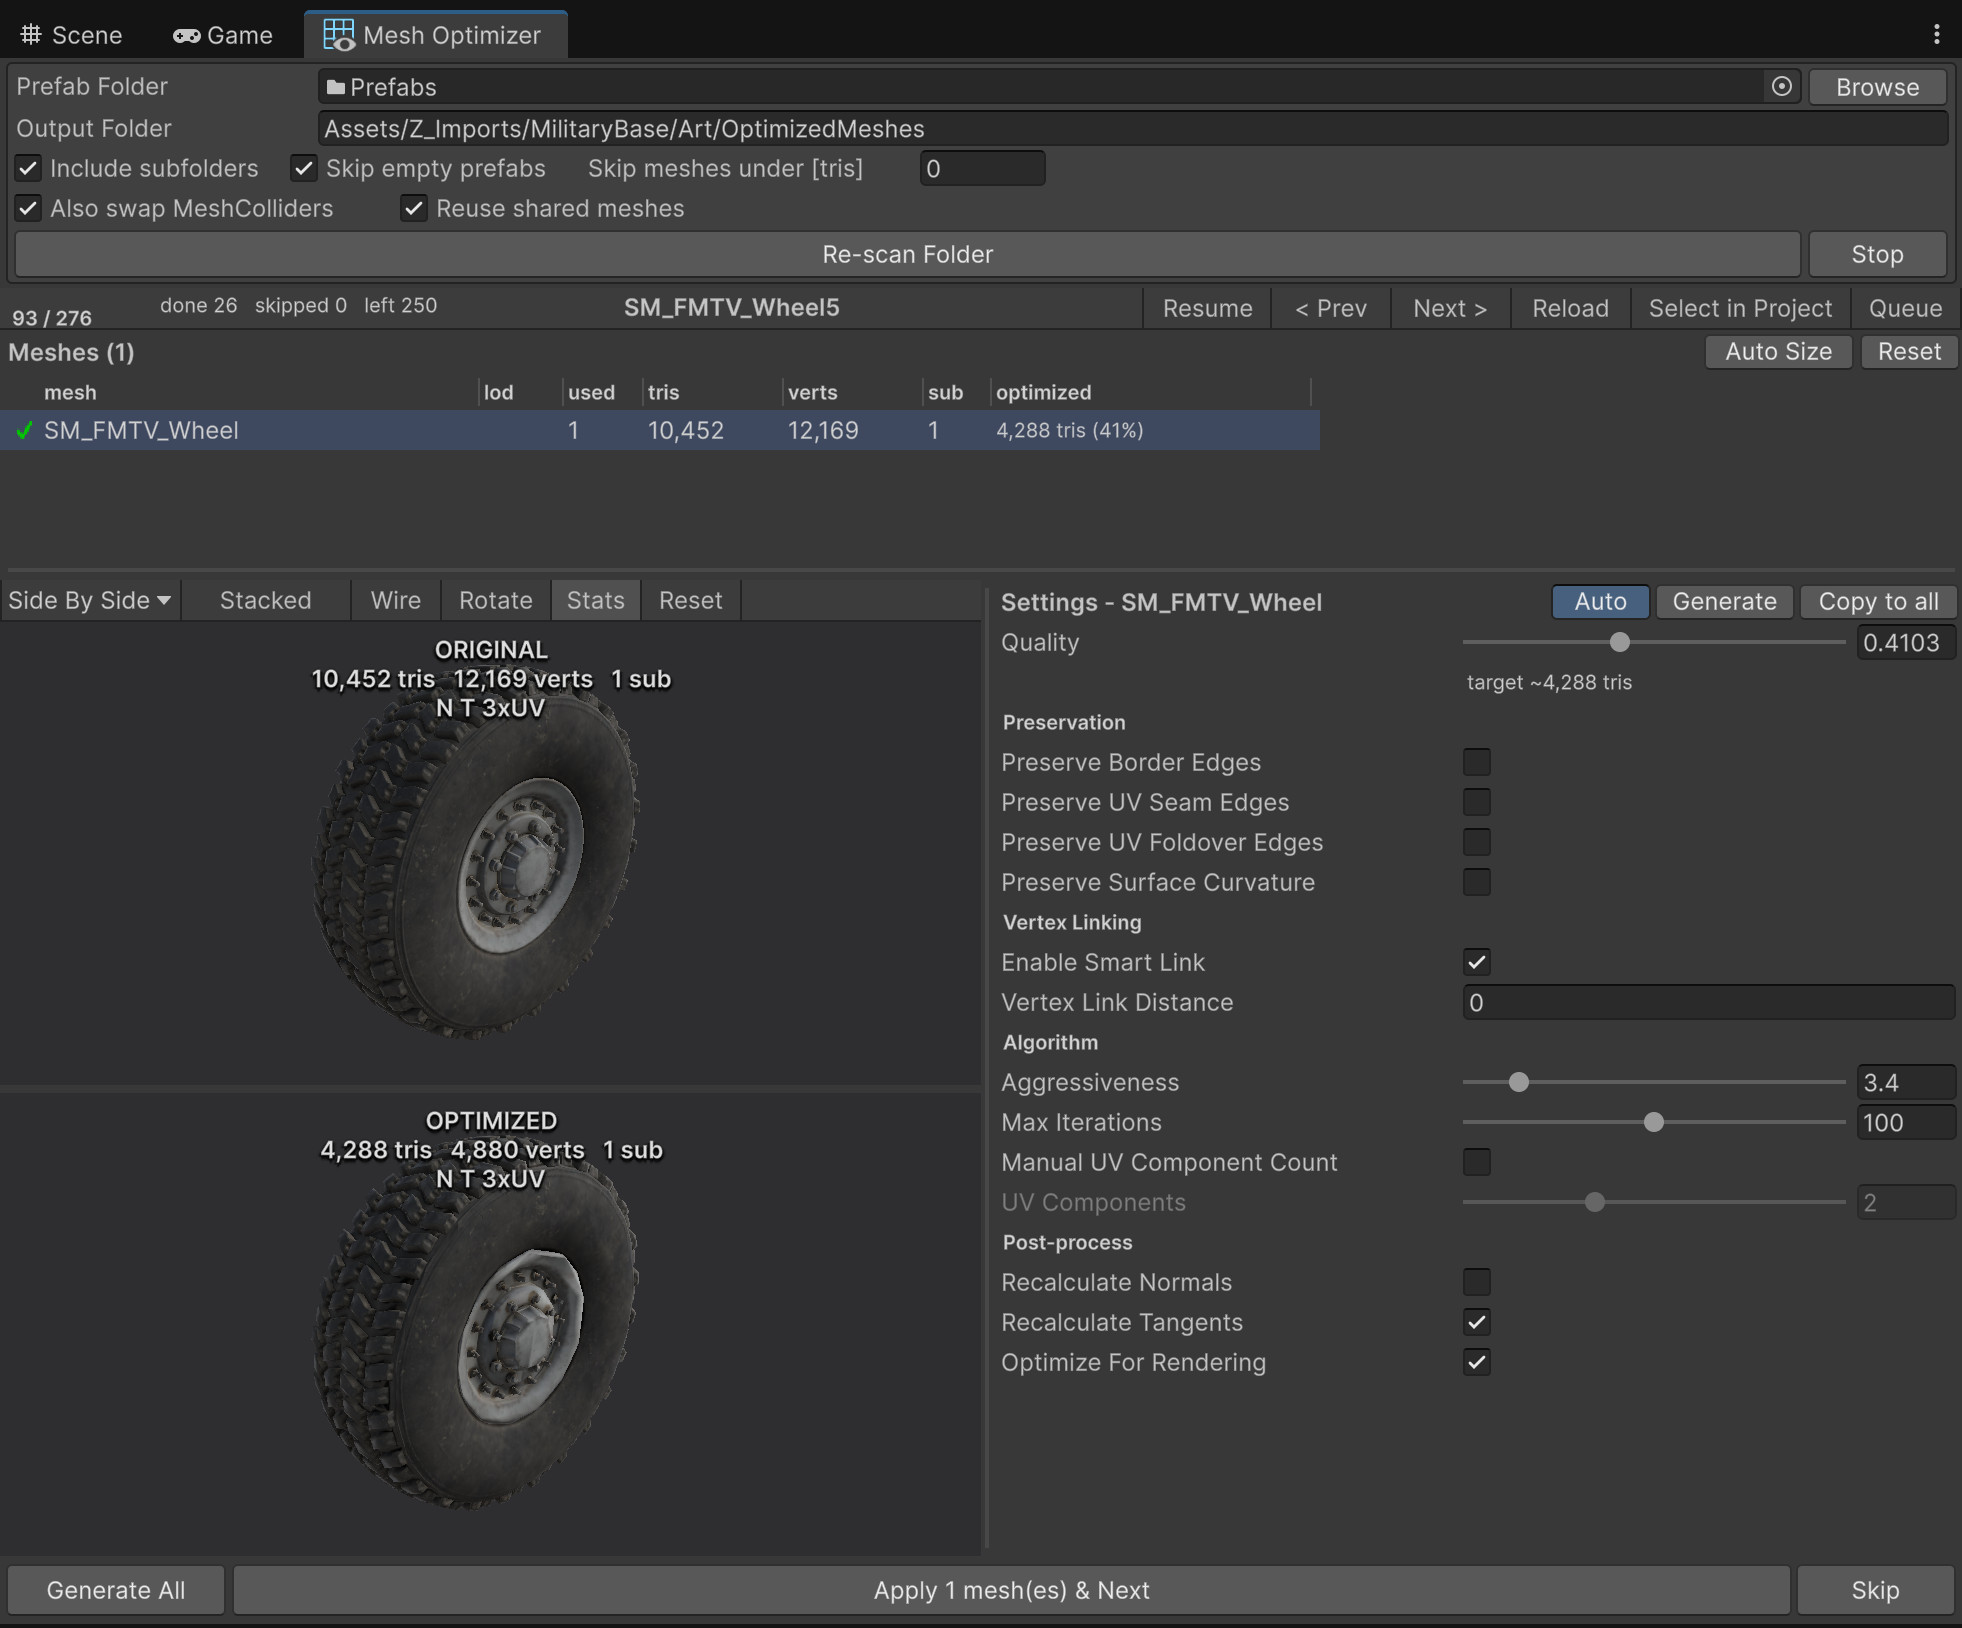
Point it at a folder of prefabs and it builds a queue: every mesh those prefabs use, with its triangle count, so you can skip anything trivial before you even start. Select a mesh and you get a live original/optimized preview side by side, the full simplifier option set, and the prefab’s LOD setup in the same window. Generation runs on a worker thread and only kicks off once you release a slider, so tuning a setting doesn’t stall the editor.
Apply & Next writes the optimized mesh, re-points the prefab to it, and moves on. If two prefabs reference the same source mesh, it’s generated once and shared rather than duplicated, and re-tuning it overwrites that same asset instead of leaving behind a chain of _opt_opt files. Progress is keyed to the prefab’s GUID and stored in ProjectSettings/MeshOptimizer.json, so it survives closing the window, renaming a prefab, or coming back to a folder a week later.
The two settings that quietly decide everything
Preserve UV Seam Edges is the usual reason a mesh refuses to shrink. On a hard-surface prop with per-face UVs, almost every edge counts as a seam, so quality has nothing left to work with. The window now detects that case and offers to unlock it. Preserve Border Edges is the opposite problem: it protects planes, fences and cards, and unlocking it erodes their silhouette instead of their density. We also recalculate tangents by default but leave normals alone, because rebuilding normals averages across hard edges and flattens the shading a hard-surface asset depends on.
Where this matters most
Poly budgets bite hardest on standalone VR headsets and mid-range phones, where a scene that renders fine on a desktop GPU drops frames the moment it’s rendered twice for stereo or throttled for battery. On our VR rehabilitation project with Hacettepe University, that’s session-by-session tuning against a device, not a one-time export setting — which is the kind of repetitive, batch pass this tool was built to absorb.
What’s still rough
It’s an internal tool that’s earned its keep, not a finished product. The two scripts are still long enough that we’re planning a code-separation pass, and there’s no way yet to delete an unwanted sub-part of a mesh (a wheel or a wing mirror inside a car model, say) before it gets simplified. Both are on our list.
The source is on GitHub. A Unity Asset Store listing is on the way.
If you’re bringing a flat game to a headset, or your build is missing its frame budget on the device that actually matters, send us the project and we’ll tell you where the triangles are going before you commit to a fix.